
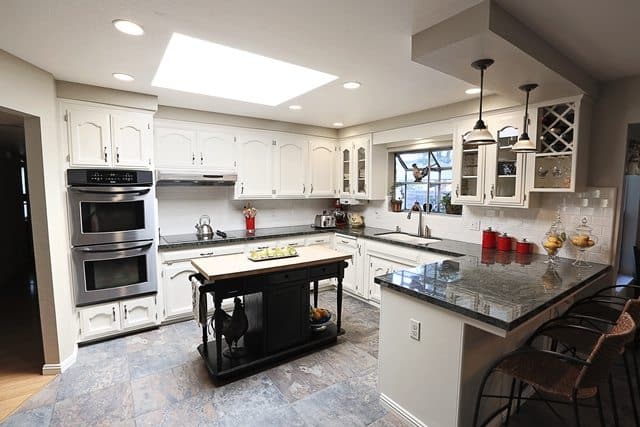
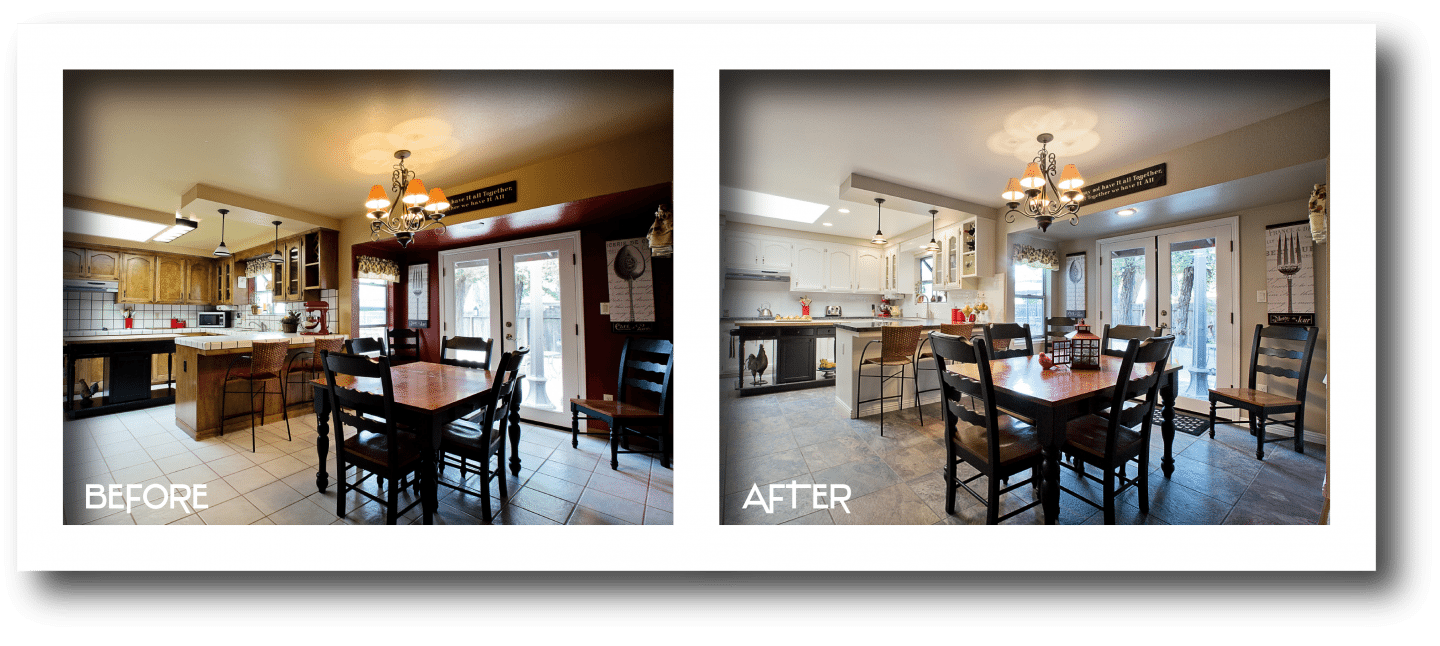
Our first kitchenCRATE in Ceres, CA was completed just a few weeks ago and we’re so excited to share this 1970’s transformation!
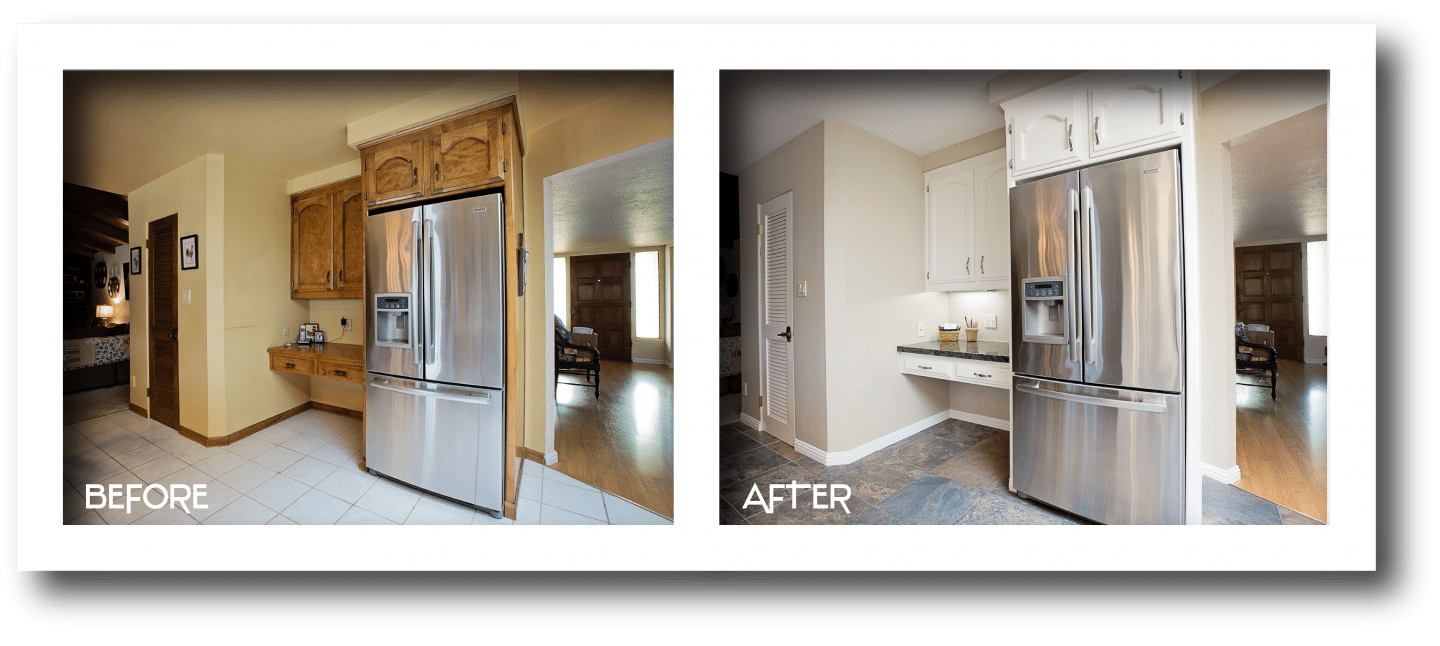
In what seems to be a trend, this homeowner added quite a few add-ons to their base kitchenBOX project: LED can lighting, simulated slate flooring and a new granite top at the adjacent built-in desk. The result? An impressive transformation in less than two weeks.
Scroll down for a detailed explanation of this project as well as the much-anticipated before & after pictures…
The Homeowner’s Experience
The kitchenCRATE team asked Mr. & Mrs. Anderson (the homeowners) a few questions regarding their experience. Here’s what they said:
What was your favorite part of the kitchenCRATE process?
Completion! Our project was completed exactly as promised. This was a concern as we had a large party planned 3 days after our projected completion date! The entire project was seamless and the kitchenBOX team lived up to every expectation.
What was your favorite part about the kitchenCRATE team?
Communication. From initial inquiry to completion the team was easily reached for questions and clarification. The team in the home was friendly and courteous.
Was there anything about the process or project that surprised you? If so, what was it?
We were pleasantly surprised at the whole process! Our biggest concerns about renovating (timeline, cost, and craftsmanship) were addressed and lived up to!! Having worked in the trade my husband was skeptical that kitchenCRATE could fullfill to the claims they advertise. We could not be more pleased with our outcome.
Day by Day Progress
Here’s how we did it:
Day 1 – Demo Day! On this first day, we set up plastic walls to protect the home from dust, protected the path from the entry door to the kitchen with building paper, and then went to town removing the appliances, countertop, backsplash, plumbing fixtures, cabinet doors, and drawers. We also removed the surface-mounted fluorescent fixtures in order to make room for LED can-lighting. Toward the end of the day, we created the template for the new granite countertops, which take a few days to fabricate off-site. Lastly, we started removing the old tile flooring to make room for the simulated slate tiles.
Day 2 – The electrical team began the wiring for the new LED can lighting, described in more detail below, while the cabinets over the sink were modified for a more modern look. We also continued with flooring demo and off-hauling of debris.
Day 3 – Since all the walls and the ceilings had been protected, our painters began preparing and priming the cabinets. Using a high-grade oil-based primer, every inch of the kitchen cabinet exteriors and interiors were caulked, sanded and primed. This is the first (and perhaps most critical) step of creating a durable paint finish.
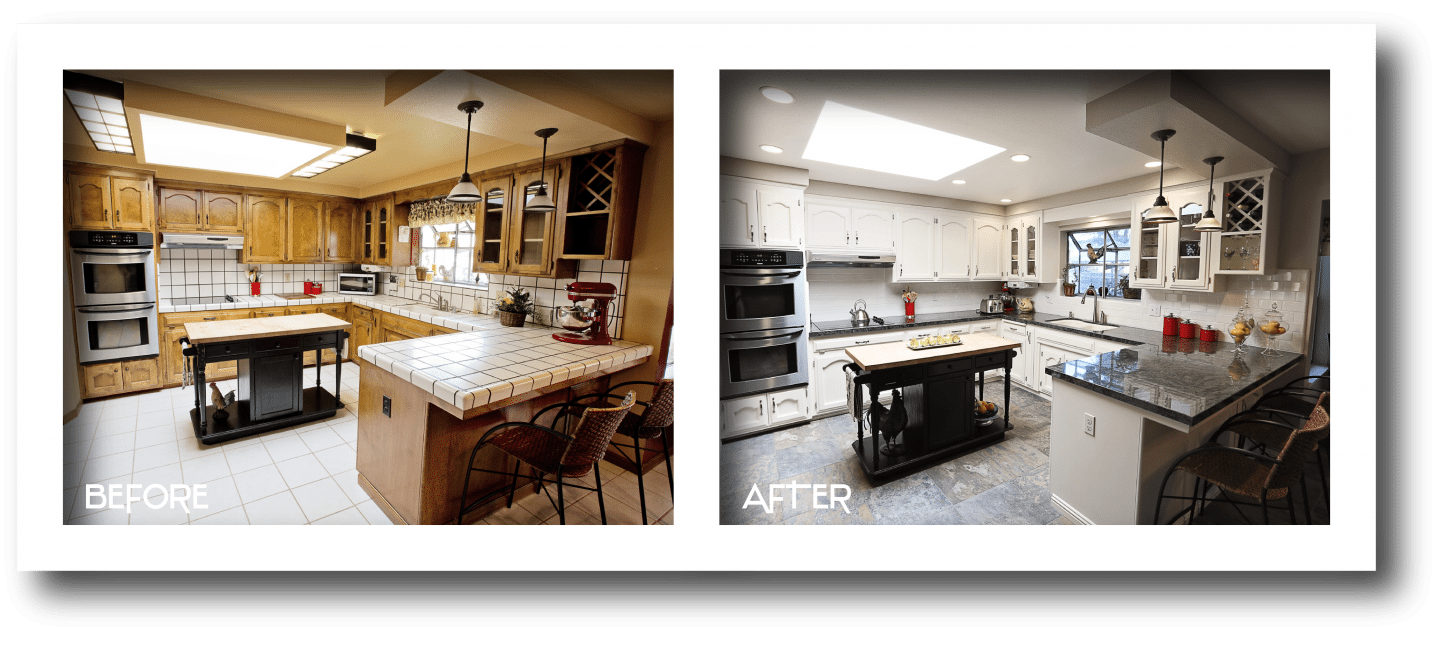
Day 4 – The painters then applied two coats of Kelly-Moore Dura-poxy paint in Rice Pudding to the thoroughly sanded and primed cabinets. This same priming and painting process was used on the doors and drawers, which are painted off-site in a climate-controlled paint booth for the highest possible quality.
Day 5 – Next, the electricians got to work installing the pattern-specific LED can lighting. Seven 5″ LED can lights were placed strategically around the kitchen. These lights are installed to maximize light levels for the most common countertop uses. The old fluorescent lighting boxes were patched with sheet-rock, textured and painted.
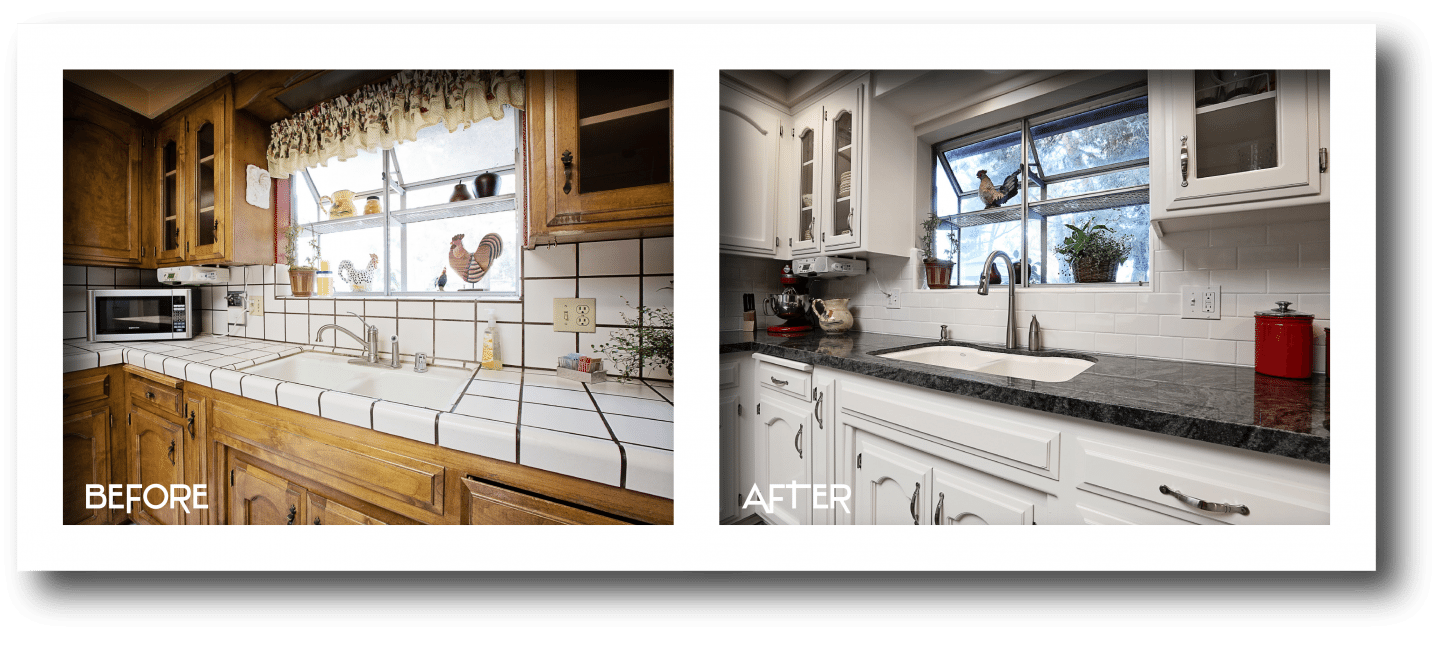
Day 6 – The capable team at AAI Granite & Tile arrived to install the beautiful Kohler Hartland undermounted sink in biscuit and the MSI Verde San Francisco countertops with a mitered edge.
Day 7 – AAI Granite & Tile was back on-site, this time to install the 3 x 6 Daltile White Subway tile with a gloss finish.
Day 8 – AAI Granite & Tile returned one more time to add Laticrete bright white grout to the backsplash.
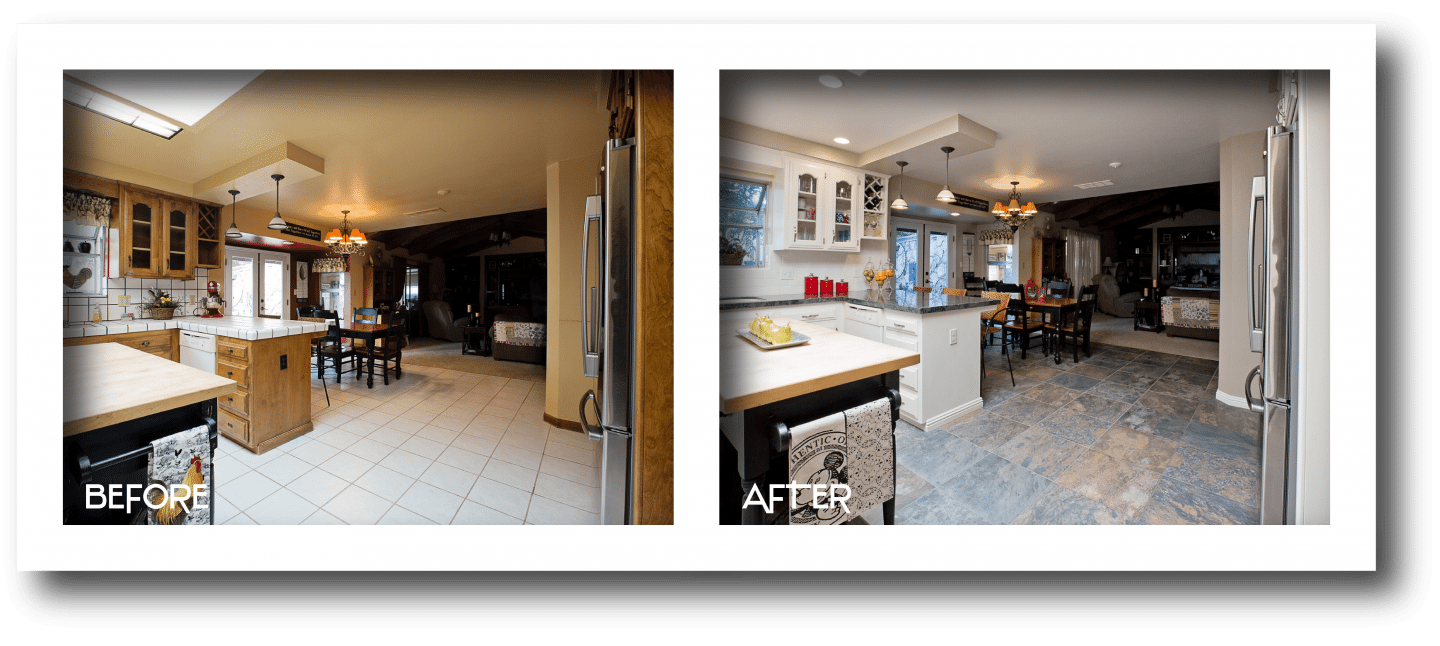
Day 9-10 – AAI was a huge part of this project as they returned for a fourth and fifth day to begin installing the 18 x 18 Simulated Slate Aspen Sunset floors to the kitchen and dinette area.
Day 11 – Lastly, the kitchenCRATE team installed the homeowner’s previous appliances. The transformation then hit the home stretch with the installation of the freshly-painted cabinet doors and drawers. The final day of the project included an array of “touch-up” items: all outlets and switches were replaced, the Kohler Simplice faucet and Soap Dispenser were installed and the entire project was cleaned, top-to-bottom.
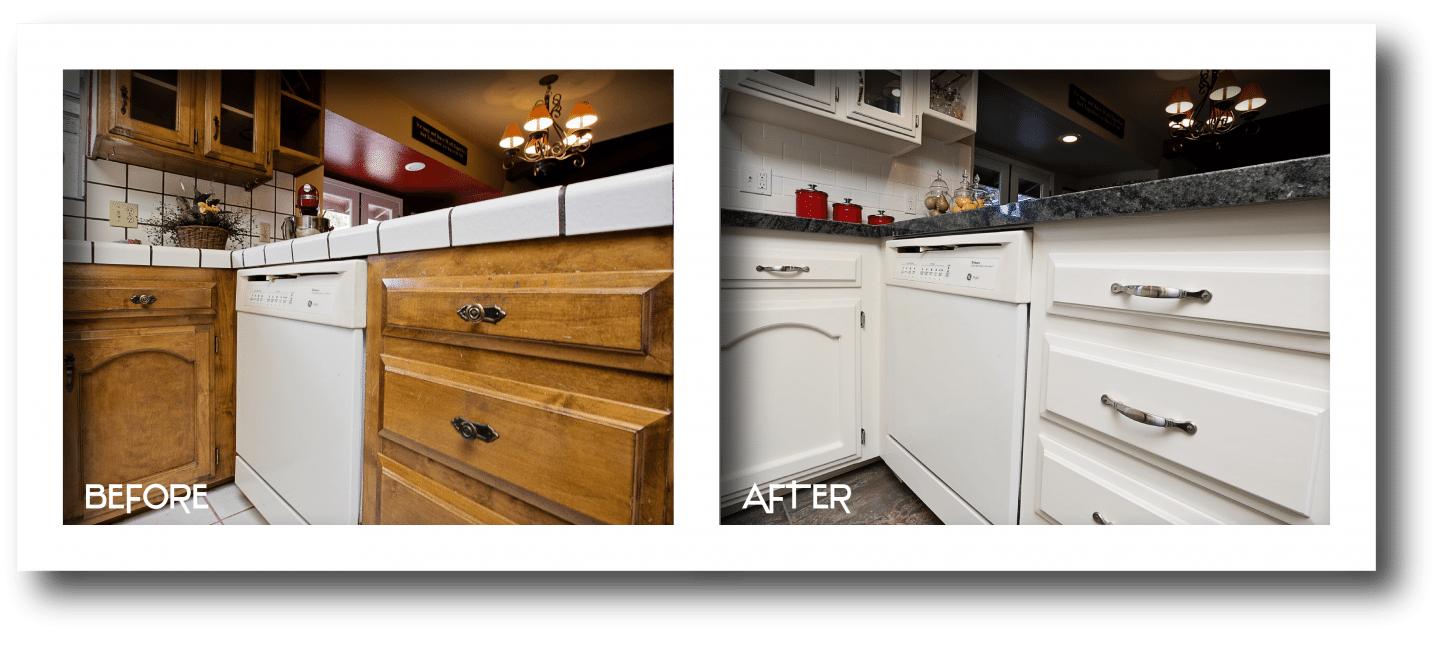
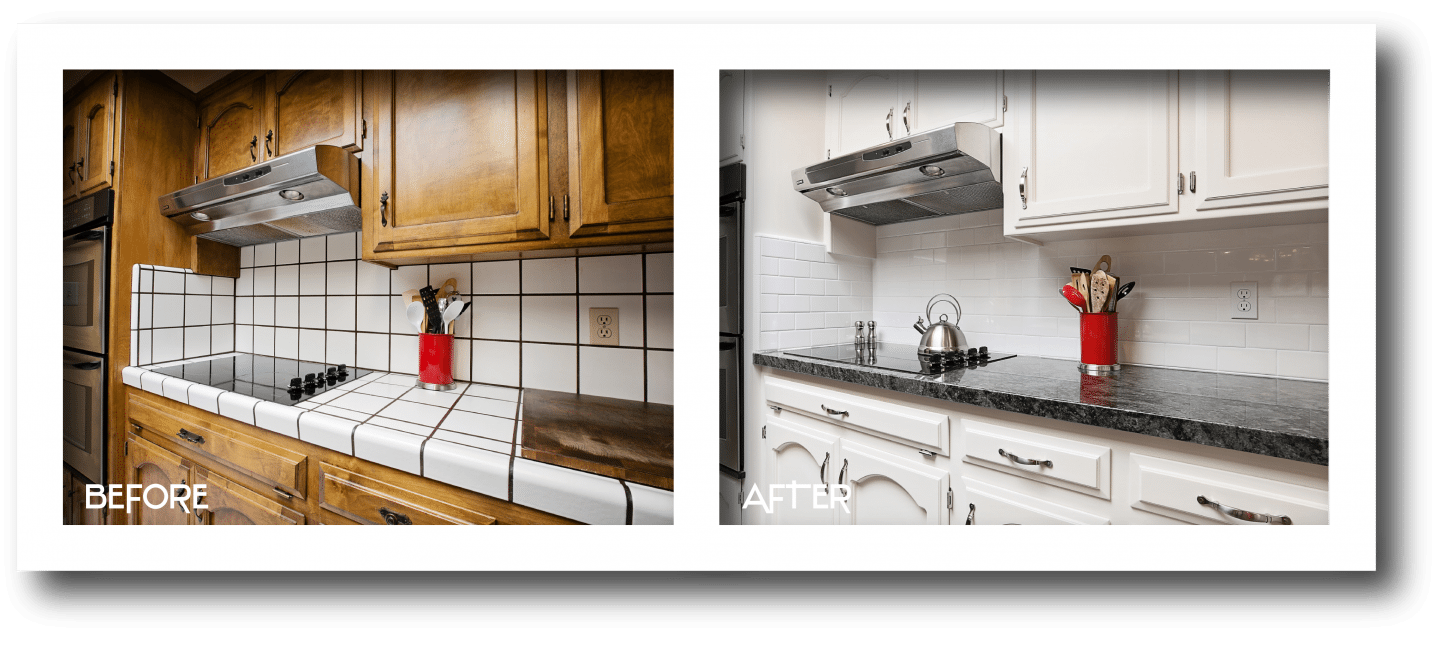
Before and After Photos
Technical Kitchen Remodel Details
Countertop: MSI: Verde San Francisco
Cabinet Finish: Kelly-Moore Rice Pudding finish using a top-of-the-line Kelly-Moore Dura-poxy paint and primer.
Backsplash: 3 x 6 Daltile White Subway tile
Grout: Laticrete bright white
Sink: Kohler Hartland under-mount sink in Biscuit
Faucet: Kohler Simplice
Soap Dispener: Kohler Transitional Design
Floors: 18 x 18 StonePeak Simulated Slate in Aspen Sunset
Wall Paint: Kelly-Moore Graystone
Does Your Kitchen Need Remodeling?
Does this kitchen look familiar? Have you been laying awake at night envisioning a kitchen just like Barry Court? Perhaps you like the layout of your kitchen and the cabinets are in good condition, but you are ready for a kitchen remodel. KitchenCRATE can make this happen in just a few days and for a low price. Contact us today at 888-995-7996!

