
In this video, CRATE Founder + CEO Scott Monday will walk you through the design details on one of kitchen & bath CRATE’s most recent master bathroom remodel in Oakdale, California.
We aren’t joking when we say this bathroom has it all… and it was completed in less than six weeks! From the stunning walk-in shower with sequel quartz shower surround to the matching quartz vanity top, this remodel sets the bar incredibly high. Even the toilet room is fully tiled! Want to see all the specifications for this amazing project? They’re all located on the project blog post here…
Is Your Kitchen or Bathroom Remodel Next? Contact Us Today!
Click here to schedule your free phone consultation today or feel free to call us direct during business hours at 888-995-7996! Also, be sure to follow us on Instagram for daily updates and live footage of current projects.
Video Transcript*
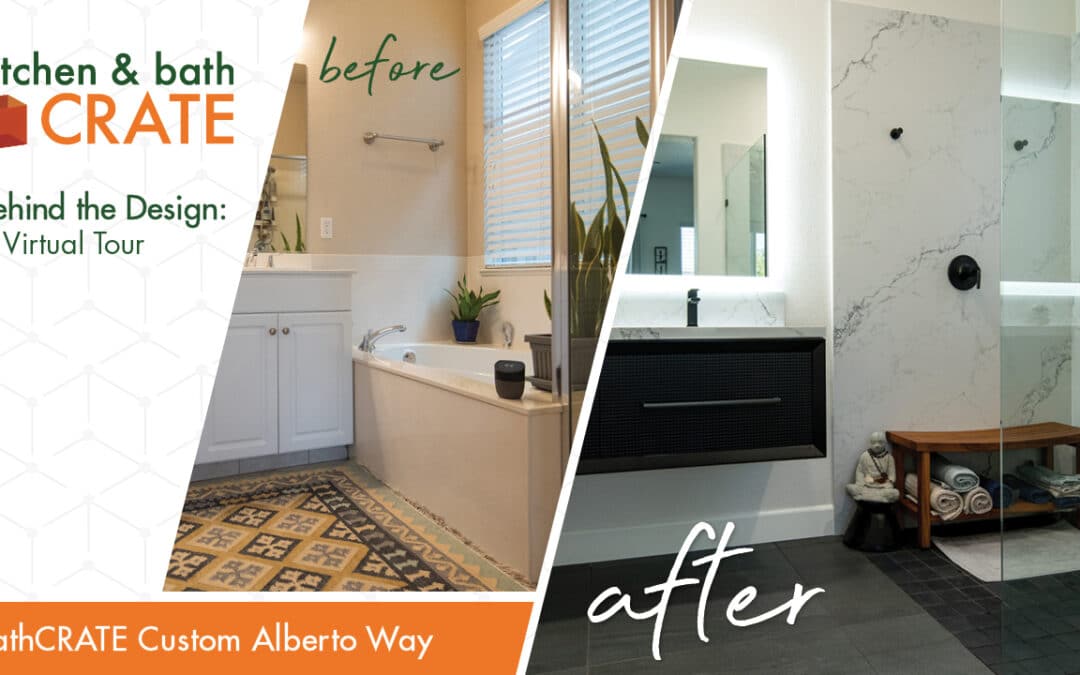
Everybody, Scott Monday with Kitchen and Bath Crate. What I want to do is give you a behind the scenes tour of a recently completed master bathroom in Oakdale. This is actually Bath Crate, Alberta Way, a 2003 home, so we’re going to jump into this tour, and I think you’re going to love what you see. What I want to do is really give you a little bit of an idea about how design decisions are made and also show you some great new design ideas and products that I think are going to come on really strong in 2023. So with that, I’m going to zoom down to the bottom corner, and we’re going to dive into Bathroom Alberta Way in Oakdale, California. So let me go full screen here.
Now when we arrived on the scene, once again, a 2003 home and a very common type of configuration. You’re going to see a little tiny shower that’s shoved into the corner of the master bathroom, and next to it, you’re going to see a soaking tub. Very common of this early 2000s project and something that a lot of customers are wanting to get rid of. Most people tell us that these bathtubs just end up being a catch-all for dirty clothes and towels and stuff like that. Just remember that’s something that creates the full usage of the space and really gives people that spa-like atmosphere that they want.
One more before picture. You’re going to see the vanity of this situation, very traditional vanity. Not sure why it almost looks like two vanities pushed together. Maybe it was two vanities pushed together, but just don’t love the way that this looks here at this particular vanity. You can see it just looks dated, tired. The floor is kind of your standard early 2000s tile. Once again, the space just needed some help. So the kitchen and bath crate team were on the scene, and what I want to do is show you a series before and after so you can see this transformation. So let’s start with the vanity area, and I think yeah, this one’s a little bit better.
So what you can see is we switched from that standard built-in vanity on the left with a six-foot, roughly maybe seven-foot fixed mirror over the top and then two vanity lights. And now you can see on the right, we have this beautiful new floating vanity. This vanity is actually a Kohler product, and it’s floating, meaning it’s off the ground. You can see that below it’s completely open to the wall and the baseboard behind. And this customer, I think they chose this mirror maybe in conjunction with our design phase, but I did see that the customer provided this mirror. I really love it. It’s a 60-inch by 40-inch, and I think I actually have right here the spec on it. It’s from this place called Mirrors and Marble, and it’s a 60-inch by 40-inch backlit rectangular wall-mounted mirror. Just really love the way this looks. You know, it’s a little pricey, right, but it is a great way to add some pop to your master bathroom or any bathroom in that regard. So really like the way that one turned out. Let me get back to my screen here.
So once again, floating vanity, which is a Kohler product, backlit LED mirror over the top. And as you can see, the floor is a beautiful new tile floor. I really like the way that that turned out. Now let’s take a look at the before and after for the shower. You can kind of see it up here on the scenes here. Now, on your left, you can see there was the old soaking tub, but on the right, you can see that that shower actually didn’t only encompass the old shower location but it actually encompasses the old bathtub location as well. Now, the window stayed in place but was made completely watertight from the inside. And one thing I wanted to point out about this shower, we actually used a quartz wall panel product. Now, this quartz is the same type of quartz that we will put on countertops. In fact, I’m pretty sure this vanity top is the same quartz. But this creates a solid surface shower enclosure, and as you can see, the vein pattern even flows right through, you know, kind of stopping at the window, picking up again. You can see this vein right here, and the fab team even got the veining to pop in and out of this shower niche. Just love those little details. I wish I could blow this up just a little bit and show you. Just really like this look. You can see a couple of robe hooks on the wall here. Now, you may say, “Well, what’s this right here? If we have our showerhead here, what’s this?” What we do a lot of times when we have these walk-in showers, this is a little design thing for you to consider. We have these walk-in showers. The last thing you want to do is walk in around this fixed glass panel, turn on a cold shower, and have it just hit you in the head. No one wants that. So what we do is we put the controls out here, the valve, if you will, that turns the water on and off. And then inside, you have the diverter valve that kind of diverts the water between the head and the wall. So this is the shower on/off and temperature control, and then this is the diverter valve that kind of sends water to either the head or the wand depending on what you want. The floor, it’s a standard four-inch by four-inch tile floor. And let’s see if we have any more pictures. Yeah, a little bit closer here. You can see that vein popping in and out. You can see the shower fixtures once again, this really cool glass enclosure, which is an 80-inch tall, half-inch thick enclosure. And this whole space just really ties in so well to the vanity, the plumbing fixtures. Looks like it’s a Delta fixture setup. Let me check real quick on my notes here. I’ll give the rundown. Yeah, the faucet, that’s actually a Price Pfister set. So it’s a Pfister in matte black. Just love the Delta and the Pfister products in matte black. You can see both the faucet and the shower system. This particular customer chose to put a little bench here in the shower for robe on and off and kind of sitting for whatever reason, your greenhouse shower. And a close-up here shows you the Kohler Caxton under-mount sink with the Pfister Deckard single-hole faucet right here. The backlit mirror that creates this cool illumination of the four-inch backsplash. And once again, the design decisions on this project are just wonderful. Let me kind of spin you around. If you kind of look the other way towards this other toilet room, if you will, a little bit of a difficult project to photograph for you, but in this toilet room, there is a kind of an integrated toilet bidet type of combo unit that’s back in there. And as you can see, the same kind of wall tile, floor tile extended up into large format wall tile in the toilet room just as another design element. So just really love this project. I hope you like it too. And I will point out because people have been commenting asking about duration of these jobs. Oh, one quick thing. See this linear drain, hidden linear drain, have one of those in my own house. It’s a must-have. Love it. One thing people want to point out is like the schedules for these jobs. This project, a real intense master bathroom with lots of movement of items and expansion of the shower and things like that. One of our longest format projects, those master bathrooms, this one took 28 days. We started on the 13th of April, which is right here, and we finished on the 20th of May. We might have got this done one day early. I can’t quite remember, but either way, it’s 27 or 28 working days, just shy of six weeks. Definitely on the longer end of a kitchen and bath crate project, but as you can see, oh my gosh, worth every day of it. Under six weeks for a pretty substantial master bath renovation. I think the industry standard on a job like this would probably be nine to 16 weeks based on our research that we’ve done. So anyway, there you go. That’s Bath Crate Master Bathroom, Bath Crate Alberta Way in Oakdale, California. If you have any questions or if you need anything from us, kbcrate.com, 888-995-7996, and I hope you enjoyed this video and enjoy the rest of your day.

